

In my opinion, astrophotography is the most rewarding hobby one can pick up. It combines an aspect of nature that we take for granted, and have - due to light pollution - forgotten about. It’s a great way to get out of the house, and enjoy the night sky. The mesmerizing beauty of the stars, and the Milky Way, is something that can’t be described in words. It’s something that has to be experienced.
In order to start astrophotography, you don’t need much. You can even start with your phone, and a tripod! However, if you want to take it to the next level, you’ll need some equipment. Here’s a list of things you’ll need to get started:
Equipment#
Camera#
This is one of the most important factors in your beginner astrophography setup. A budget-friendly DSLR camera is a great starting point. I recommend the Canon t3i or the Nikon D3500. Both are great cameras, that are used by many astrophotographers. Whatever camera you end up using has to fulfill the following criteria:
- Manual Mode: You need to be able to control the settings of the camera manually. In order to be able to adjust the focus manually.
- Bulb Mode: This will allow you to use an Intervallometer, and take long exposures.
Tripod#
A tripod is what will keep your camera steady when taking long exposures. Try getting a sturdy tripod that holds under the weight of your camera, lens, and other accessories. I recommend ones with legs made of carbon fiber, as they are lighter, and more stable.
Lens#
For now, the kit lens that comes with your camera, is sufficient. However, once you start getting into astrophotgraphy, and want to photograph certain object, you will need to buy lenses that will allow you to do so. For example, a wide-angle lens is great for photographing the Milky Way, and a telephoto lens is great for photographing the moon.
Intervallometer#
An Intervallometer is a device that can be connected to the camera (usally via USB) that allows it to simulate pressing the shutter button. This is why we needed bulb mode. You can set the Intervallometer to take a picture every x seconds, for y seconds. This is great for taking long exposures, and multiple exposures, without having to touch the camera, which would introduce shake.
Terms#

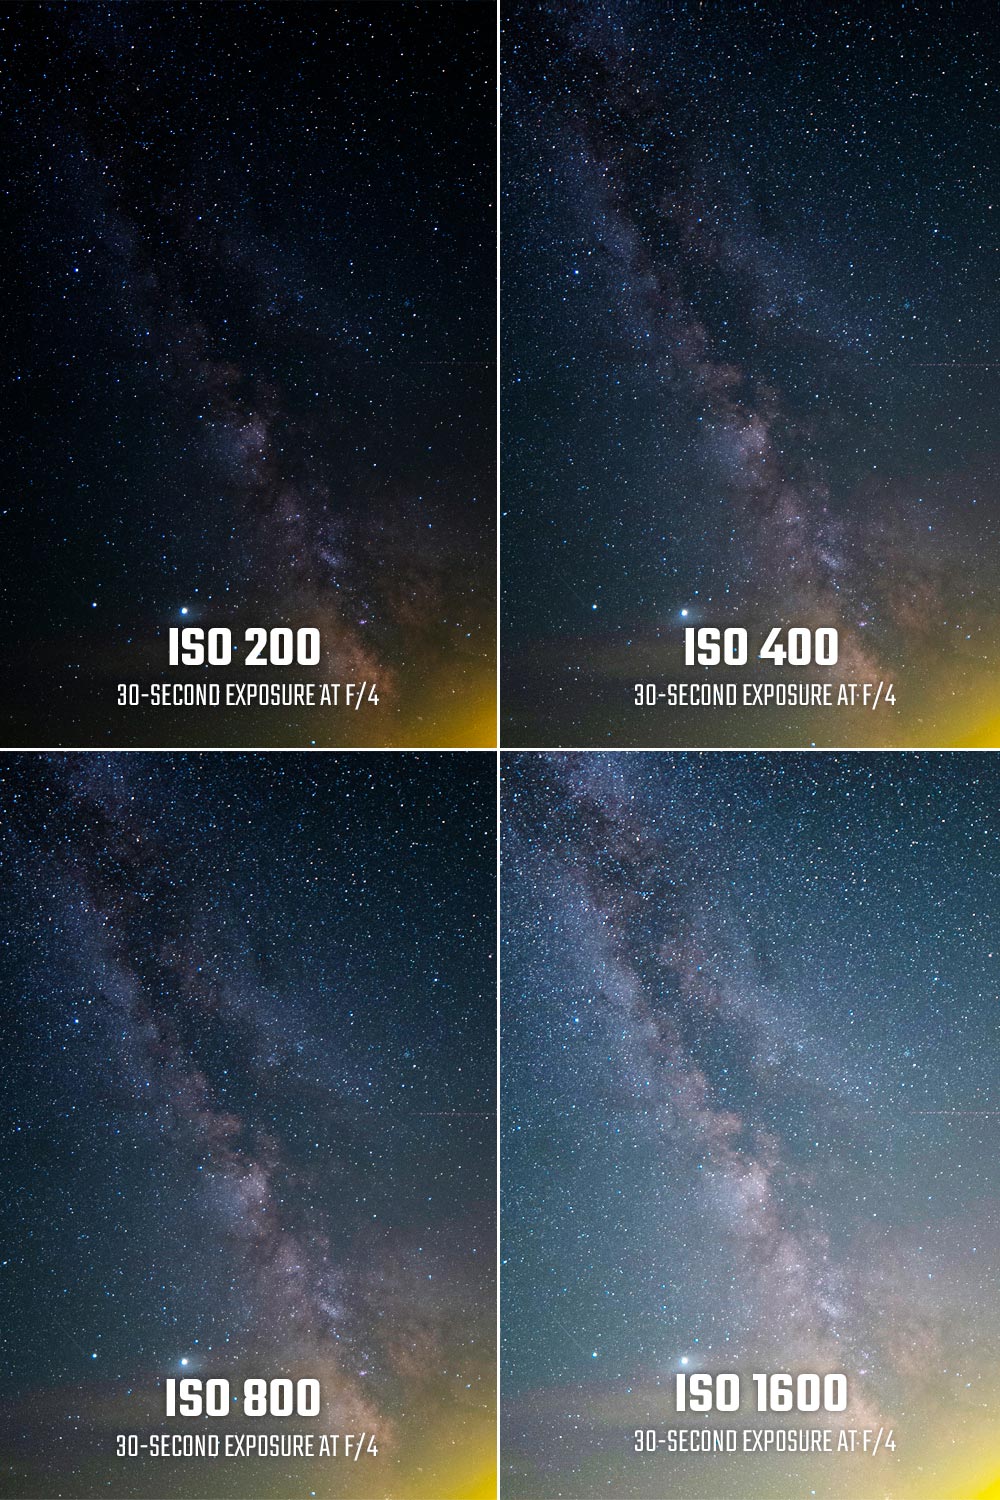
ISO#
ISO is the sensitivity of the camera’s sensor to photons. A higher sensor means more photons are being captured, which will lead to a brighter image. Usually, more light is a good thing, but in astrophotography, it can lead to noise. Noise is the grainy effect you see in some images. To avoid noise, you want to use the lowest ISO possible. But, too low of an ISO can lead to underexposed images. It’s a balancing act.
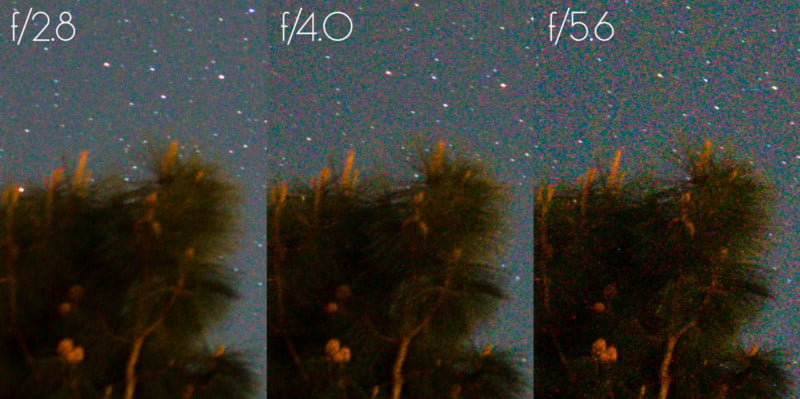
Aperture#
The aperture is the opening in the lens that lets light in. The aperture is measured in f-stops. The lower the f-stop, the larger the aperture, and the more light that gets in. For astrophotography, you want to use the lowest f-stop possible, to let in as much light as possible.
Shutter Speed#
The shutter speed is the amount of time the shutter is open, and light is hitting the sensor. The longer the shutter speed, the more light will hit the sensor. In our case, since we use bulb mode, we can set a custom shutter speed (usually > 30 seconds) to let in as much light as possible.
Common Mistakes#
Overexposure#
Overexposure is when the image is way too bright, which will lead to clipping. Clipping is when data is lost from the image because it’s too bright. To avoid overexposure, you need to find a balance between ISO, Aperture, and Shutter Speed.
Underexposure#
As you might have guessed, underexposure is when the image is too dark. This can be caused by not letting in enough light, or using too low of an ISO. To avoid underexposure, you need to find a balance between ISO, Aperture, and Shutter Speed as well.
Star Trails#
Since we are only using a tripod, and not a tracking mount, we can’t take long exposures without getting star trails. Star trails are the streaks you see in the image, caused by the rotation of the Earth. To avoid star trails, you need to use a shorter shutter speed, and a wider lens.
In the next post#
Next post will cover how to find objects, what intermediate gear you need, and how to process your images. Stay tuned!